Thursday, March 27, 2008

Spicy Vegetable Pickles: La Spiritosa

1 cup extra-virgin olive oil, divided into 5 equal portions
2 medium zucchini, cut into 1/2-inch thick medallions
3 red bell peppers, cut into 1/4-inch thick strips
1/2 lb. green beans, ends removed
2 medium Japanese eggplants, cut into 1/2-inch thick medallions
1 head broccoli, cut into florets with 4-inch stalks
2 1/2 cups white wine vinegar
20 mint leaves
5 tbsp. sugar
5 pinches hot chili flakes

In a 12 to 14-inch sauté pan, heat 1/5 of the oil until just smoking. Sauté each vegetable until tender and golden brown and remove each to a platter when finished cooking. To the pan, add vinegar, mint leaves, sugar and a pinch of hot chili flakes and stir with a wooden spoon over heat to dislodge the browned vegetable sugars in the pan. Pour the vinegar mixture over each of the 5 vegetables. Serve warm or at room temperature.

Yield: 8 servings
Prep Time: 25 minutes
Cook Time: 30 minutes
Ease of preparation: easy


RESULTS: I got this recipe from watching my new favorite show, Molto Mario. I didn't have any of these veggies, and I didn't need to serve 8 people, but I did have carrots and just enough mint from my plant for a single serving. I really liked it, I think this can be another one that can be made with lots of different veggies, depending on the season. There's no added salt, so that's good if you're watching your sodium.* A tip, though: I cut the carrots into strips, and I should have done medallions; the best parts were the golden brown spots where the sugars had started to caramelize. I used fairly high heat, but you should probably adjust that based on the veggie. And don't crowd the pan! I learned from I'm just here for the food that a crowded pan STEAMS the food instead of sauteing it, which is what you would want in this dish. As the food heats, the water in the food turns into vapor, and if you don't leave space between the food for that vapor to escape, it stays trapped at food level (or in the food itself).

On a different note, I was supposed to start my Italian cooking class on Tuesday, but I got there and was told it had been canceled! I emailed the people who run it and they haven't gotten back to me yet. I'm too busy at work to call them this week, but if they don't get back to me by Monday, look out. Chris and I did a beer and cheese tasting on Tuesday instead, lots of fun. I didn't like sheep cheese as much as I thought I would. My favorite was the aged Vermont cheddar. Yum!

*EDIT: Come to think of it, I remember in the show he sprinkled some salt on the veggies right when he put them in the pans because it would bring out the juices and the water and break down the cell walls somewhat. I don't know, maybe the salt is optional, or maybe he made a mistake (actually, he didn't really explain why you'd want to break the cell walls down, you'd think you'd want the veggies to become tender, but not soft and mushy). I might try it next time with salt. I would think that, if you just wanted the salt flavor and not the cells breaking down, you could wait and add a little later. I don't know. I didn't think my carrots needed the salt, but I also did notice it's absence. It might help to cut the sourness and acidity? Thoughts?

Monday, March 24, 2008

I'm flying home Memorial day weekend for a friend's wedding. Last week when I checked the flights on Orbitz or something, the best flight I could find that didn't make me have to leave the house at 4 am was about $239 and had a hugely long layover in Atlanta or, if I'm lucky, O'Hare, two airports that I have sworn never to fly though unless I'm actually going to those cities. And THEN, as I was about to buy the ticket, I saw an article on Brielle's website talking about sidestep.com, which compares all the camparison sites (so, while Orbitz compares USAir and Delta, SideStep compares Orbitz, Travelocity, Priceline, etc). The coolest part about the site is the page o'charts that shows how the cost of that flight has flucuated over the last several weeks (so, yesterday compared to last week, compared to the week before, etc), and also, if your dates are flexible, the cheaper days on which to fly. (I've also heard that the time of day affects the price, but SideStep doesn't have this feature yet.)

So, I knew that over the past few weeks, Monday was a cheaper day on which to buy the ticket, and I knew what were the best days on which to fly, since my dates were flexible. Today, I found a NONSTOP flight for LESS than the flights with layovers, and it was only $171. When I was a kid and still enjoying the few flights we went on, I was so surprised that they would charge less for flights with layovers, since you got to go on more flights, and you got more pretzles and more Coke. Shouldn't they charge more for flights with many legs? :) Anyway, I just saw on TV that a US Air pilot accidentally fired his gun in the cockpit, which could also have something to do with my great deal on a USAir flight, but we're not going to worry about that.

AND, because I seem to be turning more and more into my father's daughter, I knew I could do even better, and I skipped buying the ticket through Orbitz (you can't actually buy tickets through SideStep.com) and bought it directly from the USAir website and saved myself an extra $5 in fees. Pretty good. I went from a $239 ticket putting me through one or both of the worst airports in the country to a nice, breezy $169 nonstop. I think I'm more proud of the last $5 I saved than the first $65. I'm also proud of the fact that, when Chris teased me for spending an additional 15 minutes to save that $5, I said without even thinking, that I'm enjoying myself, so I'm getting some utility out of it. ("utility" is fancy-pants econ-speak sort of equivilent to "happiness.") Don't tell me I don't know anything about econ. Boo-ya.

Sunday, March 23, 2008

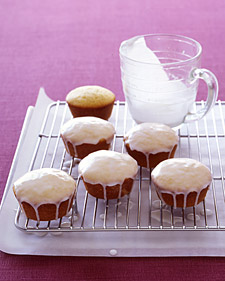
Glazed lemon (or lime) cakes


GLAZED LEMON CAKES

1/2 cup (1 stick) unsalted butter, room temperature (plus more for muffin tin)
1 1/2 cups all-purpose flour, plus more for muffin tin
2 tsp. baking powder
1/2 tsp. salt
1/2 cup low-fat buttermilk (or plain low-fat yogurt)
1 tsp. vanilla extract
Finely grated zest and juice of 1 lemon (plus 2 tbsp. juice for the glaze)
1 cup granulated sugar
2 large eggs
FOR THE GLAZE:
1 1/2 cups confectioners' sugar

Preheat oven to 350 degrees F. Butter and flour a muffin tin.

In a medium bowl, whisk the flour with the baking powder and salt. In a small bowl, whisk together the buttermilk or yogurt, vanilla, lemon zest and juice. Set aside.

With an electric mixer, cream butter and granulated sugar until light. Add eggs one at a time, beating well after each addition. With mixer on low speed, add flour mixture in three batches, alternating with two additions of buttermilk or yogurt mixture. Divide evenly among muffin cups.

Bake until a toothpick inserted in center of cake comes out clean, 20 to 25 minutes. Cool 10 minutes in tin, then cool completely on a rack.

Set rack over wax or parchment paper.

TO MAKE THE GLAZE:
In a small bowl, stir confectioners' sugar with remaining lemon juice until smooth. Pour over cakes, spreading to edges with a small knife. Let set 30 minutes.

PREP TIP:
A pastry brush is great for coating muffin tins and other small baking pans with butter because it can reach corners.

PACK THE BASKET:
To transport, place glazed muffins back in the tin, cover with wax paper.

RESULTS: Well, it's snowing on Easter, so what's to be done but bake? I used limes for this instead of lemons. I don't know, I just like limes better! The only problem is that limes are smaller than lemons, so you sort of have to guess on what the right amount to use would be. Still, I liked these, they tastes a lot like the glazed lime cookies, but were cakes. Pretty good, a little gummy as they got cool. Mine took longer than expected to cook, but I think that may be because I might have had too much juice in there, which could also explain the gumminess. Oh well.

EDIT: Cupcakes the next day have a distinct flavor of motor oil. Since this recipe is one of the love it or toss it pile I tore out of all our Martha Stewart magazine, I'm tossing.

Saturday, March 22, 2008

Alfredo Sauce variation


Alfredo Sauce (with fettuccine) from Cookinglight.com: "We used half-and-half instead of whipping cream and decreased the amount of butter and cheese ever so slightly to lower the fat by about 10 grams per serving."

1 pound uncooked fettuccine
1 tablespoon butter
1 1/4 cups half-and-half
3/4 cup (3 ounces) grated fresh Parmesan cheese
1/2 teaspoon salt
1/4 teaspoon black pepper

Melt butter in a large skillet over medium heat.

Add half-and-half, cheese, salt, and pepper; cook 1 minute, stirring constantly. Reduce heat; add pasta, tossing gently to coat. Cook pasta according to package directions, omitting salt and fat.


RESULTS: I'm including this mostly for comparison's sake to the other alfredo recipe below, which was delish, but way rich. This recipe was just awful, and looked nothing like the photo online. Either the half-and-half separated or the parm cheese never melted, but it was as lumpy as if I had added scrambled eggs. Even if it hadn't been lumpy, it didn't taste anything remote close to an improvement over pasta with butter and cheese, which is sort of my standard. If it's a pasta dish, the nutrition or taste improvement over pasta with butter has to be significant enough to counteract the work that went into preparing it, and this definitely did not. Plus, we know from experience that creamy sauces don't reheat well at all, so I couldn't even save the leftovers! Not that we wanted it again.

Herb update: The mint is completely out of control already. I'm glad I knew this about mint beforehard, because otherwise I might have been afraid it would start calling me Seymour, asking for me to feed it. It has literally and at least DOUBLED in height in two weeks.

On the tamer side, the parsley has just exploded upwards. It's definitely taller than the basil, which seems to have decided to take a break from growing up to work on leaf growth, which is great because I can't transplant it to it's permanent home until the first set of true leaves come in. Exciting stuff!

Thursday, March 20, 2008

Dijon Vegetable Roast

Lest you think all I cook is chocolate and cheesy pasta dishes, here's a vegetable recipe from Cooking Light:

Dijon Vegetable Roast


Ingredients

  • 1 (1-ounce) slice white bread
  • 5 1/2 teaspoons olive oil, divided
  • 5 teaspoons country-style Dijon mustard
  • 1/4 teaspoon salt
  • 1/4 teaspoon freshly ground black pepper
  • 1/4 teaspoon grated lemon rind
  • 1 1/2 pounds small red potatoes, quartered
  • 1 medium onion, cut into 1/4-inch-thick wedges (about 8 ounces)
  • Cooking spray
  • 2 cups cherry tomatoes, halved
  • 12 pitted ripe olives, drained and halved (about 1/3 cup)

Preparation

1. Preheat oven to 350°.

2. Place bread in a food processor; pulse 10 times or until coarse crumbs measure 1/2 cup. Spread crumbs on a baking sheet. Bake at 350° for 5 minutes or until golden.

3. Increase oven temperature to 450°.

4. Combine 4 teaspoons oil, mustard, salt, pepper, and rind in a large bowl; stir well with a whisk.

5. Combine potatoes, onion, and remaining 1 1/2 teaspoons oil in a large bowl; toss well to coat. Place potato mixture on a foil-lined jelly-roll pan coated with cooking spray. Bake at 450° for 20 minutes. Add tomatoes and olives to pan. Bake an additional 10 minutes or until potatoes are tender. Add potato mixture to mustard mixture; toss gently to coat. Sprinkle with breadcrumbs.


RESULTS: This might be a "no duh" for those of you who can already cook, but not for me! I liked it. It wasn't SPECTACULAR, but it was good. I'll make it again. AND, I think it would be quite versatile, I bet you can use just about any veggies you want (maybe not leafy greens). I was thinking it would be especially good with asparagus, and in fact, when I was looking it up online so I could just cut and paste, the very next recipe below this was the exact same thing, but with asparagus. :) I think it would also be good with roasted broccoli and cauliflower and potatoes, and maybe wedge of cabbage (that might be tricky, but it might work). Carrots would be good.... I can even see cutting up a crisp apple and roasting that for a bit as an accent flavor. Could be daring! I'm not the type to recommend eggplant with anything, so I'm not sure how it would be with that... actually, it might not work with any members of the squash family, summer or winter. Might be worth a shot....

I didn't quite stick to the recipe: I salted a little bit the potatoes and onions before I roasted them. I added halved artichokes from a can and added them with the olives (although, I think I should have added them with the potatoes to get them nice and brown). I didn't have cherry toms, so I put in canned petite diced tomatoes (next time, I think I'll just leave out the tomatoes if I don't have fresh or dried). I also used lime zest instead of lemon, but I added a splash of lemon juice to the mustard, and I would definitely do that again. I also made way too much sauce... I'll try not to overdo it next time. :)

I didn't quite get the point of the breadcrumbs. Next time, I'll leave them out.

A note on tomatoes: in the last year or so, I've become really intolerant to out of season "fresh" tomatoes. I don't know if it's because anything comes to Indiana has to go by land and not by boat, so tomatoes coming up from Mexico have to be driven, or if there aren't very good greenhouse tomato growers, or whatever (I really don't know how we come to have tomatoes here in the winter, but whatever they're doing, it ain't working), but the tomatoes here in the winter are just awful. They taste like unripe-tomato-flavored snow cones and have the consistency of watermelon rinds, and they cost $4/lb. So, I stopped buying them. If they're not in season, I just use canned tomatoes, or nothing. The book I'm reading now, Animal Vegetable Miracle, is Barbara Kingsolver's new book, and she talks a lot about the importance of buying local produce, which also means you have to buy it in season. I don't agree with a lot of what she says. Sometimes, it seems she skews the facts to make her case stronger without addressing the objections. She also seems to take an add view of things. For example, she seems to regret the decline of smoking in this country because it makes the tobacco farmers have to farm something else, which is sad but lung cancer is sadder. The whole book is about why big agriculture (big corn, big soy) is bad for the farmers and consumers, but why doesn't big tobacco fall into that? Maybe if people could only buy organic, small farm tobacco it would a) be more expensive, so people would smoke less, and b) have fewer carcinogens in it. I just think she should look at both issues the same way.

But this buying local produce in season idea makes a lot of sense to me because I have started tasting the difference. One thing I'd like to eventually try is drying tomatoes, so I can still have un-canned tomatoes even in the winter and spring in dishes like this one that need something that holds up like a tomato and not tomato glop, as in what you would get with canned diced tomatoes. To do this economically, I think I first need some tomato plants, and to do that economically, I think I first need a backyard that I can dig up. So, this will have to wait until we buy a house, but that's ok because I don't know the first thing about drying tomatoes. Except that you need a tomato.

Go Belmont!

Wednesday, March 19, 2008

By the way, I gave up on reading Five Quarters of the Orange by Joanne Harris. It was REALLY annoying. Lots of "had I known that my life would never be the same from that moment on..." or "we didn't know that we were making such a huge mistake..." and then you don't find out why what happened was so awful. Annoying.

Truffles (not the fungus)


Well, it's been a busy week and work and will be for another 9 days, so I'm not expecting to have much energy for posting until April. So, here's one of my very favorite things to make: chocolate truffles. They are so not hard to make, but they're so tasty, and there is a lot of room for variations and playing around with it. I'll share some of my experiments, but please let me know what you come up with, too! If you've never made them before, I would start with the basic recipe.

By the way, the parsley sprouted a couple days ago and it has well caught up to the basil, which sprouted over a week before. I'm so excited to see what happens!

Makes about 30.
ingredients
8 ounces good-quality semisweet chocolate, chopped
1/2 cup heavy cream (aka heavy whipping cream)
2 tablespoons liqueur such as Cognac or Grand Marnier or plain vanilla extract (very optional)
1/2 cup unsweetened cocoa, sifted


preparation
1. Place chocolate in a bowl. Bring cream to a boil in a small, heavy saucepan. Pour cream over chocolate. Let stand for 3 to 5 minutes; gently stir until smooth. Add liqueur and stir to combine. Cover loosely with plastic wrap and refrigerate until firm, at least 3 hours.

2. Sift cocoa into a bowl. Using a measuring spoon, scoop up 1 teaspoon of chocolate, and quickly roll into a ball about 3/4 inch across. Drop into cocoa; roll each truffle in cocoa to coat. Chill until firm. Store in an airtight container in the refrigerator for up to 2 weeks.


TIPS: I've made this a few times and the first few were terrific duds. I got this recipe off of Epicurious.com and one thing I like about this site is you can print off selected reviews from other people who've tried it (sort of like a whole lot of me's giving advice on the same recipe). It does cause issues. This one person said she was a pastry chef, and it drives her crazy to see a recipe with chocolate that doesn't call for a pinch of salt. That seemed reasonable, but every time I've tried it with the salt, the truffles don't ever set, and I end up using the ganache as a middle layer in brownies. And I've never seen a truffle recipe, or ganache recipe for that matter, that calls for salt. So don't do it. Also, it really means heavy cream (aka heavy whipping cream). I also learned the hard way that this is not the same thing as whipping cream. It must say "heavy," or, again, you're just making chocolate goo.

Also, it will be tempting, but no matter how small of a batch you are making, do not microwave the milk to get it to boiling. It won't keep the heat long enough to melt the chocolate.

As for the chocolate, I really like using good quality chocolate chips, not chopping up a bar. It's cheaper and easier.

I really can't vouch for whether these will last for 2 weeks in the fridge. They rarely make it to 2 days.

Other tips: you can add whatever dash of flavoring that you want, or none. I like vanilla, but I'd also like to try mint extract. Whatever you use, it will really be a subtle addition. And you can roll it in whatever you want. I like confectioners' sugar and cocoa powder.

Jean got me an awesome melon baller as a wedding present and that's a really great tool to use for scooping out the chocolate. It's all in the wrist.

Last batch, I wanted to try shaping the ganache some other way than balls. I have a lot of candy molds, and what I did was temper some bittersweet chocolate (I'll post on that later), mix in a pinch of chili powder for kicks, coat the molds with the tempered chocolate, let that harden, and then glop in the ganache. Then I sprinkled the top of the mold (which will be the bottom after I pop them out) with my sugar/cocoa powder mix, and chill until its hard. I was afraid it would stick to the mold, but it turned out really well. I think it's because the chocolate was tempered.... I'm not sure I'd try this by putting the ganache right into the mold. Maybe it would work, who knows!

Saturday, March 15, 2008

Mom's Bells and Whistles Irish Soda Bread Part 2: The Bread Itself

1/2c currants or raisins
3T Irish Whiskey (Bourbon may not be used as a substitute though Scotch may be)
3c sifted flour
1t salt
1 1/2t baking powder
1t baking soda
1T light brown sugar
1/4c chopped candied orange peel
2t caraway powder or seeds (I prefer the seeds)
1 1/2c or more buttermilk (see directions below)

Soak currants or raisins in whiskey an hour or more.
Sift all dry ingredients together.
Toss currants/raisins & whiskey marinade through flour mix.
Mix in orange peel & caraway.
Stir in enough buttermilk to make a light dough, like muffin dough.

Use greased, floured 10" circular pan or skillet.

Bake at 350 for 35 min.

Cake should shrink from sides of pan when done.

Cool 1 1/2 - 2 hr. before serving.


RESULTS: Victory!! This was what I wanted. I don't care for the orange peel in the bread, though, but everything else is great. This is a little wetter and softer than the other bread, and if you don't put it in the round pan like it says to, it spreads out a bit like a giant cookie. Still good though. I'm not sure the currants and whiskey add much, so if you don't care for those, I think you can leave them out. The dough is just really tasty. Sorry Beth, Mom wins!

PS: I gave some to Suz and Brad WHO JUST GOT ENGAGED!!!! and Suz said she COULD taste the currants (couldn't taste the whiskey) and the oranges were her favorite part, and thought they worked perfectly with the currants. So, I'd say, if your tastes lean that way, go for it. The oranges were fun to make, anyway,

Mom's Bells and Whistles Irish Soda Bread Part 1: Candied Orange Peels


Mom has been sleuthing for me the best candied orange peel to use in this recipe. Many recipes that she found assume that you'll be coating them in chocolate, which we felt wouldn't be the right one. I found two recipes in Joy of Cooking, and am trying the easier one (version 2), which is a quicker process (save the soaking overnight part) that makes a softer peel (I thought this would be better in a bread), but they don't keep as long (not a problem). My problem with Joy of Cooking is that she has a high opinion of her readers and their instincts so her recipes are often open to interpretation. This kind of overestimation has burned me in the past, so I'll try to add my own notes.

  • Cut into strips grapefruit or orange peel (I used one orange).
  • Soak for 24 hours in salt water to cover, using 1 T salt to 4 cups of water (I ended up only needing 1 cup of water to cover)
  • Drain peel.
  • Rinse and soak for 20 minutes in fresh water.
  • Drain, cover with fresh water and boil for 20 minutes (I did this on med. high heat).
  • Drain again.
  • Measure sugar in equal parts with the peel (My peel, when smooshed into a measuring cup, was about 3/4 c, so I used that much sugar)
  • Cook the peel (I used med. to med. low heat). Add a VERY little water, ONLY if necessary, until the peel has absorbed the sugar.
  • Shake the pot as the syrup diminishes, so that the peel does not burn.
  • Dry thoroughly and store tightly covered.

RESULTS: Well, this is a delight to cook. The peels were just beautiful in the pot, and they started off with that sharp orange smell, but then they smelled spicier, and there was a caramelly under-smell. They taste good, too. I have no idea what the ideal orange peel would be like for this bread recipe, but just looking at the oranges, they seem to have a lot of sugar caked on them, a little like rock salt but not nearly as hard. I wonder if I used too much sugar, or if I stirred too much in the beginning or shook too much toward the end. I'll likely make these again, I want to try dipping them in chocolate (which the first recipe in the book is designed for).

Friday, March 14, 2008

Foodie Tours

Brielle, my friend from high school, and her husband Chris have started a website called Foodie Tours (see the link on the right side). It's all about culinary vacations, and they have a bookstore. Eventually, they'd like to gear up to have bookings online, but right now they're focusing on populating the forum and have started a posting contest.

Thursday, March 13, 2008

dried mushrooms revisited

I know what I did wrong with the gritty mushrooms. See my reply to Dave here.

By the way, has everyone heard that they're making the last Harry Potter book into TWO movies?

Basil sprouts


Here are some basil sprout pictures:

What I thought I'd do was put them in the bottom trays of the pots because the books recommended sowing them in trays. I didn't count on so many sprouts coming up, so this might be a little hard to keep just the few best sprouts. I might just let them duke it out for a bit. I won't transplant until they get their first set of true leaves, looks like it could be a couple weeks still. I'll keep you posted! By the way, the macro setting on the camera works much better when the zoom isn't on, as I just found out. I tried taking all these pictures of flowers before, and it didn't work because I thought you had to have macro on AND zoom. Silly me.

Chris and I went out for dinner tonight. I had a Stromboli with tomatoes, cheese, garlic and CRAB. It was good. I'm going to smell like garlic for a while, though. :)

Blech!

I made a sauce for ravioli today that was made from dried porcini mushrooms and butter, cream and shallots. Dis-gusting. The mushrooms were completely gritty, it was like eating sand. Luckily, we tasted the sauce before pouring it on the ravioli, so we just had the ravioli with butter. I might be better with fresh mushrooms, but I think I'll forever associate that flavor with grit. Chris wasn't too excited about the smell, either.

It's been an eventful week here. I caught a 36-hour bug, Chris pulled a shoulder muscle, Harper swallowed a mysterious pointy something, so we've been on dog-watch all night to make sure she doesn't puncture her stomach. I think she's fine, though. Thanks to her vet, Dr. Beth!

In quieter news, my basil is totally spouting. There are little basil plants all over the tray, it's great. I hope some of them make it to adulthood. No parsley yet, but there isn't supposed to be since it takes so long to sprout. Yesterday was also gloriously warm and sunny. Spring can't be far off now. Hurray!

By the way, for those of you know someone celebrating their 100 Wedding Anniversary, apparently the gift to give is a 10K diamond. We're just going to stick to paper this year.

Monday, March 10, 2008

Nevermind, the Dark Irish Soda Bread passes muster

I just had another slice, now that it's cool, and it tastes WAY more like soda bread. Before, it really tasted more like rye bread, but cool the sweetness comes out a bit more and it firms up. So, make sure you let your bread cool completely!

Dark Irish Soda Bread (Cuisine: Irish; Course: Bread)


Well, I'm trying the one that Bethie sent first. Lest you think I had a specific reason for doing so, I made the decision based solely on the fact that I had neither candied orange peel nor Irish whiskey (I have Seagram's... is that ok? There's only going to be a little whiskey in there...). Mom just sent me a recipe for candied orange peel, and I found a recipe in my Joy of Cooking. Maybe the next thrown-down can be the candied orange peel throw-down! (although, Mom's has much better directions, so I might just go with that.) Regardless, I am NOT avoiding the currants, aka tiny raisins.

Dark Irish Soda Bread

The Washington Post, March 5, 2008
  • Cuisine: Irish
  • Course: Bread

Summary:

This soda bread gets its appealing brown color from molasses and whole wheat flour. The flour used here is the traditional whole-wheat flour that is made from red-wheat berries.

It's best eaten on the same day it is made, but it tastes great toasted the next day. The bread can be wrapped well and frozen for up to 1 month. Defrost with the wrapping on so that any condensation will form on the foil and/or plastic, and not on the bread itself.

Makes one 8-inch oval loaf (12 servings)

Ingredients:

  • 2 tablespoons melted unsalted butter (plus softened butter for greasing the baking sheet)
  • 1 1/2 cups whole-wheat flour, plus more for the baking sheet
  • 3/4 cup flour
  • 1 tablespoon dark or light brown sugar
  • 2 teaspoons caraway seeds
  • 1 teaspoon baking soda
  • 1/2 teaspoon salt
  • 1 tablespoon molasses
  • 1 cup low-fat or regular buttermilk

Directions:

Position a rack in the middle of the oven; preheat to 375 degrees. Lightly grease a rimmed baking sheet with softened butter, then sprinkle lightly with whole-wheat flour; tap to discard any excess flour.

Combine both flours, brown sugar, caraway seeds, baking soda and salt in the large bowl of a stand mixer or hand-held electric mixer. Mix to combine on low speed; add the melted butter.

Combine the molasses and the buttermilk, then add to the mixer bowl, on low speed; beat for a minute or two, until a soft dough forms. Gather the dough into a ball and roll it around in the palms of your hands to smooth it; the dough will not be perfectly smooth. Form into an 8-inch long oval and place on the prepared baking sheet. Use a smooth-edge knife to cut a slash about 5 inches long and about 1 inch deep along the length of the loaf.

Bake for 30 to 35 minutes, until the bread feels firm and crisp and you can see that the bottom has browned when you lift it carefully. Transfer to a wire rack to cool.


RESULTS: some of the molasses seeped up from the knife cut and caramelized, which was really good. The next time I make this bread I might try just drizzling a little bit in the cut (although you don't want to put so much that the bread would be soggy or the sugar might burn. It's a fine balance). The texture was light and fluffy, and the whole wheat had a good chewy-ness. I love the caraway seeds and the bread smelled really good as it was cooking.

However, did this meet my Irish soda bread craving? I have to say, not really. It was excellent bread, and especially for being a whole wheat bread, it was really fluffy. But I like my Irish Soda Bread to be a little denser, so you KNOW you're eating bread, like, for hours later when you're still not hungry. It could be that I didn't wait for it to cool all the way before slicing, I really don't know what that does to the final texture. I was hungry! Or, I might have needed to stir it longer to get the dough a little tougher.

Anyway, bottom line, this was a great recipe and hats off to Bethie for finding it, but it didn't quite feed the need. The search continues.


Sunday, March 9, 2008

Battle of the Irish Soda Breads

Every year when I was little we would go to the Science Fair at my grade school, which was always in the beginning of March. The science fair was pretty cool, every grade had a theme, up until the 7th & 8th grades where the students did their own individual experiments. A boy in my class, for example, proved definitively that Stain Stick removed stains better than Spray & Wash (although that would be disputed in future Science Fairs). They always had a bake sale, and we would always get some of the Irish Soda Bread this one lady would make every year. So I really start to crave it right around the time that it starts warming up.

For those of you who don't keep track in the comments, my mom sent me her recipe for Irish Soda Bread. Bethie also emailed me one that she found in the Washington Post (my favorite part about this article is that under the name of the dish, "Dark Irish Soda Bread," it listed cuisine, "Irish" and course, "bread." Thank goodness they spelled that out for us). These recipes are very different from each other and from the bread that you can get at the Irish Lion here in town. Beth's is made with whole wheat flour and molasses, and Mom's has all the bells and whistles--the bells being candied orange peels and raisins or currants and the whistle being Irish whiskey.

In the next couple of weeks, I'll make one loaf of each and report back. I'll try to be as faithful to the recipe as I can, despite the sad truth that I can't agree with my mom when she said that she "prefers raisins" (to currants. I don't prefer raisins to anything!). Currants seem to be tiny raisins, which have been put on my list and crossed out, as Red Danaher would say, but I will try them!

Maple Corn Bread

This is from Cooking Light magazine:

A preheated cast-iron skillet is essential to create a crisp crust and moist interior.

Ingredients

  • 1 1/3 cups all-purpose flour (about 6 ounces)
  • 2/3 cup stone-ground cornmeal
  • 2 teaspoons baking powder
  • 3/4 teaspoon salt
  • 1 cup plain low-fat yogurt
  • 1/3 cup maple syrup
  • 1/4 cup butter, melted
  • 2 large eggs, lightly beaten

Preparation

1. Preheat oven to 425°.

2. Place an 8-inch cast-iron skillet in preheated oven for 10 minutes.

3. Lightly spoon flour into dry measuring cups; level with a knife. Combine flour, cornmeal, baking powder, and salt in a large bowl, stirring with a whisk. Combine yogurt, syrup, butter, and eggs, stirring with a whisk. Add yogurt mixture to flour mixture; stir just until moist (batter will be thick).

4. Remove pan from oven; coat pan with cooking spray. Spoon batter into preheated pan, smoothing top with a spatula. Bake at 425° for 20 minutes or until a wooden pick inserted in center comes out clean. Remove from oven; cool in pan on a wire rack 10 minutes.


Results: Well, admittedly, I used regular pancake syrup with this instead of maple syrup because a) people who left a note about this recipe online said they couldn't taste the maple anyway and b) I was out.

Also, I pulled it out of the oven too soon. My oven runs hot, so I check things early. The toothpick came out clean with a minute to go, but the inside was still a tad bit gooey. The parts that were done were still moist, which was good, and it had sort of a nice subtle tangy flavor from the yogurt. But, I have to say, not my favorite corn bread. Brad liked it, but I don't think I'll make it again. On the plus side, the whole house smelled of pancakes.

If you do make it, I didn't think it was all going to fit in my 8-in skillet, but it did, and it didn't puff very much during cooking.

Saturday, March 8, 2008

coconut rice

To give myself a small spring break during a very snowy Friday evening, I made coconut rice last night, and I think I may be in trouble. It was really really good.

Combine 3 cups light coconut milk (about 2 cans), 2 cups uncooked long-grain white rice and 2 bay leaves in a medium saucepan. Bring to a boil. Cover, reduce heat and simmer for 20 minutes or until liquid is absorbed. Let stand 5 min; discard bay leaves. Fluff with a fork, and stir in .5 teaspoon of salt (kosher if you have it).

I never before understood the fluffy rice thing; I like my rice clumpy and chewy. With this dish, though, I wanted to savor every individual grain it was so good. Let me know if you try it with brown rice!

The recipe had an accompanying dish called spicy tomato sauce. I liked what I made, but I had deviated so far from the recipe that I'm not sure I could really tell you what I did. Basically, you saute shallots (I used onions) and garlic lightly in peanut oil (I used canola), and then mix in Thai chiles (which I obviously skipped), brown sugar, lime juice, lime zest (which I didn't have) and tomatoes, and let that simmer for about 20 minutes. My rice wasn't done after its 20 minutes, so I kept both of them on the heat, but then I forgot about them because I was posting yesterday's posts. By the time I got back there, the rice was perfect and the spicy tomato sauce had reduced so much that it was sweeter than sun-ripened tomatoes. The tomatoes had almost completely disintegrated, the onion had gone way past caramelizing and somehow reverted to a simple sugar state... it was great with the rice, but I think that may have been a happy accident, never to be repeated.

Friday, March 7, 2008

miso dressing part 2

So, I tried the vinegar with the miso dressing (see here and here). I thought I'd replace one teaspoon of the soy sauce with one teaspoon of white vinegar. What I actually did was put in one TABLESPOON each of soy sauce and vinegar. So, I can't taste the vinegar, but it's still salty because I put in, oh, a thousand times too much soy sauce. I believe that my insides are actually pickling. It's not too sweet this time, though, I reduced the sugar by a third. I would say, this is the perfect sweetness.

Snowy day here in Bloomington for the (students') first day of spring break. I have to work next week, but that doesn't stop fellow full time staff from wishing me a happy spring break. It's nice to not have students around.

I'm trying to grow parsley and basil from seeds. We'll see how it goes. Each seed packet was only $1.07, so, what the hey?

Wednesday, March 5, 2008

lime-glazed cookies

I had a big presentation today for the staff, so I baked cookies. Seems reasonable.

Makes: 32

  • 3/4 cup (1 1/2 sticks) unsalted butter
  • 1/4 cup granulated sugar
  • 1/4 cup confectioners' sugar
  • 2 tablespoons grated lime zest, (2 medium limes)
  • 2 tablespoons fresh lime juice
  • 1/4 teaspoon salt
  • 1-1/2 cups all-purpose flour
  • 3/4 cup confectioners' sugar
  • 5 teaspoons fresh lime juice
  • 1 teaspoon grated lime zest
  1. With an electric mixer, cream butter and sugars until light, scraping down sides of bowl as needed. Add lime zest, lime juice, and salt; beat until combined. Add flour; beat until dough is just combined.
  2. Place dough on a 16-by-12-inch piece of parchment or wax paper. Using your hands, shape into an 8-inch log; flatten into a rectangle (1 1/2 inches high and 2 1/2 inches wide). Fold paper over log; flatten sides against work surface. Refrigerate dough until firm, at least 1 hour and up to 1 day.
  3. Preheat oven to 350 degrees. Line two baking sheets with parchment. Slice dough crosswise 1/4 inch thick; place on sheets. Bake, rotating sheets halfway through, until cookies are puffed and barely golden, about 15 minutes. Transfer to a wire rack to cool; glaze.
  4. To make Lime Glaze: In a small bowl, whisk together all ingredients until spreadable. Using back of a small spoon, spread about 1/2 teaspoon glaze on each cooled cookie.
RESULTS: A lime explosion in your mouth, very nice for early spring. The cookie is buttery and flaky, and the glaze is sweet and tart... like a sweet tart! I brought them to work and the only constructive criticism I could get out of people is that I didn't make enough.

I had some problems getting the log to square up right because the dough was so soft, so I think it would have been good to chill the dough a little, either in the mixing bowl or in the parchment, before squaring the edges. If the dough gets too soft to slice with your sharpest knife, flip it upside down.

As for baking, I used my great silicon baking mat, which worked perfectly. I would say if you think you've cut them thin, err on the side of golden brown doneness, but be careful because they can turn colors pretty fast. Ideally, they would be thick enough so that just they can hold together just barely brown. Once you put the glaze on, though, you can't taste the difference. Finally, I was worried about the glaze, I didn't think that 5 teaspoons of liquid could really melt all that sugar, but it did!

Tuesday, March 4, 2008

Man, I'm just a post-maniac tonight. I have to vent. I started reading the Golden Notebook by Doris Lessing. She won the Nobel prize for literature, I figured I should give it a shot. The whole first chapter, which was at least 50 pages long, was nothing but this awful, canned dialog. Like the kind that's only purpose is to insert conflict for conflict's sake, and to introduce us to the characters, like "As you know, my oldest friend Anna Wulf, I was divorced from Richard for 20 years and have just returned from a year abroad. As you also know, I am a amateur actress and I tend to talk with my hands." It was AWFUL! And it's not like it was poorly translated, she's British! Now, I will say that once I slugged through the first chapter, I did notice that the next chapter seems to be a complete different style, so maybe it'll be better. If not, I'm returning that sucker to the library and getting some more Agatha Christie. You got to love that Miss Marple, she's such a card.

Fettuccine Alfredo

This weekend was very lamb-y, but today was nothing if not lionish, (although I DID have my first flower spotting of the season, a whole mess of snow drops and some flowers that were tiny yellow fuzzy balls. I have no idea what they were, but my neighbor had a slew of them) so I thought what better for dinner than fettuccine alfredo. Bethie, and other poor lactose intolerant souls, this is not for you. I got the recipe from wikipedia, of all places, but that also means I can just copy and paste the recipe below (ignore the links in the ingredient list):

The tricks to making a good Alfredo are gentle cooking and a proper balance of ingredients. The sauce should be just thick enough to coat the pasta without pooling on the bottom of the plate, but it should not be so thick as to be glue-like. The sauce can be made in the time that it takes to bring a pot of water to the boil and cook the pasta.

Fettuccine Alfredo should be served immediately, because as it cools the large amount of fat in the sauce will congeal too much. If it cannot be served immediately it should be made thinner in the pan than you want it when it's plated and presented.

This recipe will sauce one pound of pasta and serves 6 as a first course.

Ingredients

Preparation

  1. Combine 1¼ cups (300ml) cream and the butter in a saute pan large enough to accommodate the sauce and later the pound of pasta. Heat over a low flame, stirring frequently, until the butter is melted and the cream comes to a bare simmer. Remove the pan from the heat once the butter is evenly incorporated into the cream.
  2. Cook the pasta, draining it a little before it reaches the al dente stage. The pasta should be slightly undercooked before being added to the sauce because it will continue to cook while the sauce is being finished.
  3. Drain the pasta and add it to the pan, along with the remaining ½ cup (100ml) of cream, the cheese, the salt, the nutmeg, and several grinds of the pepper mill.
  4. Heat the pasta and sauce over a low flame, tossing continuously, until the cheese melts into the sauce and the sauce thickens slightly, about 1 - 2 minutes.


Results: Wow. That's a lot of cream and cheese. Even more cheese than my macaroni au gratin, which I will post the next time I make it. I think it was, if you can believe it, too creamy. Maybe it would benefit by having some of the cream replaced by normal milk? I don't know how that would affect the end results. Also, I didn't use NEARLY that much cheese, maybe more like 2/3 of a can of grated parm (6 oz) instead of 1+ cans. Finally, I decided it was still missing something, and it wasn't more cheese. It needed a little....kick. I decided the whole thing was drastically improved by a little sprinkle of Old Bay. BAM! Even Alton Brown of Good Eats fame says it's his favorite spice. Now that's something.

Casualties: possibly a few arteries. Will let you know later.

Texas Caviar

In a large bowl, toss together 1 can (16oz) black-eyed peas, rinsed and drained, 3 Tbs minced roasted red peppers, 1 small diced tomato, 1 diced jalapeno (seeded, if desired, for less heat), 1.5 Tbs chopped fresh parsley, 1 Tbs olive oil, 2 tps Worcestershire sauce, .5 tps chopped fresh oregano, 1 tps balsamic vinegar, and a dash of hot sauce. Season with coarse salt and ground pepper. Drizzle with a little more balsamic vinegar before serving. Serve with a slotted spoon. Serves 6.

Results: Meh. This is a cold dish, and Chris wasn't thrilled with that. I wasn't thrilled with how bland it was, although I admittedly left out the jalapeño due to fear. Legumes, esp. black-eye peas and black beans, are some of the few "healthy" foods that Chris and I both love, so I'm always trying to find better ways to prepare them, and this didn't make the cut. Any suggestions?

Less chemical-y cleaning

I've had conversations and emails with both Suz and Jean about cleaning without bleach and chemicals, and since I posted the baking soda trick, does anyone want to contribute some more ideas? I would like, for myself, having all these tips together. (Jean, I could post that email you sent me if you wouldn't mind.)

You need a google account to reply to posts (this is to keep out the crazies), so if you don't have one and don't want to get one, just email me and I'll post it. Think of this as an exchange of ideas between people that I really meant to introduce to each other at my wedding but forgot. :)

As an aside, I got that baking soda thing from Martha Stewart, and she said it works better if you have fresh baking soda. If your soda isn't fresh, she had come up with this absurd replacement with things that I think you might need security clearance and a top secret supplier to get, things that no one would have around the house, so you might as well just run out and get some more baking soda!

Monday, March 3, 2008

I tried the custard again chilled, and it was even better than warm. The one potentiall negative thing is that the egg flavor comes out a little more when it's chilled, so people who don't like eggs are going to dislike that nuance. I like egg, though. I was thinking of upping the maple syrup, but I don't know how that would affect the final texture and cooking. Anyone know?

I played around with Google Earth for about two hours yesterday because in the most recent version, they added this thing called Google Sky. It's like a globe of the sky as seen from earth, but with pictures from Hubble and other telescopes mapped in, and they also have microwave and infrared. It's sooooo cool, especially if you love stars and maps. Which I do. Note to google: what would also be cool is Google Moon or Google Mars, where you can look around on the moon or Mars just like on Google Earth. There might not be enough data, but I think it would be a neat idea one day.

Sunday, March 2, 2008

Maple Custard

Yesterday started out very badly. I was on my way to the market to once more look for herb seedlings (right now, I'm thinking basil, parsley and peppermint), and not only did they not have any herbs, but the warning lights on my dashboard lit up like all those cliches about things lighting up. I'm bringing the stupid car into the shop tomorrow. To be fair, it was free (and I'm so incredibly grateful to my family for giving it to me, because there's no way I could have afforded to buy a car on my own while I was in school), and it is way nicer and still running way better than any of the other 12-year-old cars I've owned. And the seat warmers still work, so it's got that going for it.

I was also having issues with Comcast. I'm just trying to pay the bill, but because Comcast just bought Insight, which was who we were using for internet, the billing system is all screwy and they hadn't sent us a paper bill yet. So I couldn't pay my past-due bill by check, nor could I pay it online because the account numbers changed, and the first guy I talked to gave me the wrong account number, and the second guy's system wasn't working so he couldn't check. Luckily, I did get a paper bill in the mail later in the afternoon. Phew!

Suz and the dogs came over to play, and although that was fun and Suz definitely cheered me up, Harper bashed me in the nose with her titanium unripe-melon head.

On the cooking front, I tried to make some of the black bean soup in Joy of Cooking. Bethie said it was really good, but I didn't listen to her and use canned beans, I went with the recipe and used dry beans. I accidentally threw out the water they were soaking in, so all that yummy starch when down the drain, and the beans just never really cooked through. So, Bethie, I'm sure the soup is good when you do it right, but I didn't and it's sort of a watery crunchy mess, and I forgot to take out the bay leaf before using the stick blender, so there's all these little pieces of bay leaf in it. I couldn't keep simmering it last night because we went out to karaoke, but I'm working on simmering it some more today. It's a little better, soup is always better the next day, and I think I'll try running some of it through a sieve to see if that gets the crunchy bits out.

HOWEVER, the day drastically improved when I made a recipe from the maple cookbook that Kathy sent me last week (thanks Kathy!!!).

4 eggs, lightly beaten
1/2 c pure maple syrup
1 tsp pure vanilla extract
1/4 tsp salt
3 c milk, heated just to boiling

1) Preheat oven to 350. Bring 4 c of water to a boil and reserve.
2) with a whisk, gently blend the eggs, syrup, vanilla and salt. Slowly stir in the hot milk. (don't overdo the stiring, or the custard will be grainy) Ladle into 6 custard cups, filling each to within 1/4 inch of the rim.
3) place cups in a large, shallow casserole dish and carefully pour the boiled water into the pan, until it comes about halfway up the cups. Bake for about 50 minutes, until a knife inserted near the center comes out clean. Serve warm, or cool to room temp, cover, and chill.

Results: Very very very close to the fabled maple custard cups I had in Japan. Actually, it was a bit like heaven. I loved it, at least taste-wise. Any flaws were purely on the part of the cook. I halved the recipe, but then I wasn't sure about how that would affect cooking time. Also, the cups I used were maybe wider than the cups envisioned in this recipe, so the custard didn't come up as far on the cups, and so when I added the water, it was actually too much water. My understanding is that the water acts as a heat bank, absorbing the heat from the oven and only gradually giving it to the custard so it cooks evenly and slowly, but I think too much water makes the custard not cook fully. I added the water halfway up the cups, but I think it should have been halfway up the custard instead.

Anyway, all this means is that the cooking time was off. It still wasn't done after 50min, so I took some water out with a turkey baster (which I bought the one time I ever made a turkey and have carried around with me ever since) and put them back in. I think I took too much out, though, because when I pulled them out a couple minutes later, I think the eggs were starting to separate (if you overcook eggs, they start to lose their water). Also, I may have underbeat the eggs, since the cookbook says to be careful not to overbeat; I had a big glob of egg white in one of them. It was still delicious, though. I also added some more syrup on top, just for good measure. Brad and Suz were kind enough to try some when they picked me up for karaoke, and they liked it, too.

Casualties: one burnt finger. I unknowingly spilled some water on my oven mitt when I sucked some of it out with the turkey baster. Be very careful, water pretty much makes oven mitts useless. Luckily, I touched the casserole dish (which, as we know, is not terribly hot because the water is sucking up all the heat) instead of the oven rack (which I've done before), so it wasn't so bad. When the custards are finished, I would definitely recommend taking them out of the water (with tongs, if possible) and leaving the water and the casserole dish in the oven until it all cools down.
Here's a picture from last fall. Chris bought Harper a Redskins jersey. She's none too happy about this and is giving us the ol' stink eye because, you see, she's a Cleveland Browns fan. It's really the only thing that Chris and Harper don't see eye to eye on. We're a family divided by loyalties, like the War of the Roses. This fall's going to be rough, what with the AFC North playing the NFC East. Chris and Harper are going to be sad puppies when the 'Skins sweep them.